

Effective data capture is the lifeblood of any successful sales or marketing campaign. If you're in the market for sales automation tools, chances are you've encountered Pipedrive.
This platform boasts a user-friendly interface, integrated features, and adaptable data-capture forms. These Web Forms, though usefully integrated into the platform, offer limited customization options and require premium users to purchase an add-on.
In this comprehensive guide, we'll explore the pros and cons of using Pipedrive forms and take you through the steps to create one.
We'll also show you how to build dynamic forms using Feathery integrated with Pipedrive.
What's Pipedrive?
Pipedrive is a sales-focused customer relationship management (CRM) software designed to help small and medium-sized businesses manage leads, track communications, and automate mundane tasks.
What sets Pipedrive apart from its competitors is its emphasis on activity-based selling. This describes a focus that drives you to interact with leads, not just observe them.
Pipedrive's key features
When it comes to features, Pipedrive doesn't disappoint. Here's a quick rundown of the features that make this CRM software a top choice for many companies:
- Activity-based selling: The core philosophy behind Pipedrive is to ensure that your team consistently engages with prospects rather than just tracking them. Activity-based selling is the antithesis of the "set it and forget it" mindset. Instead of simply tracking metrics or waiting for leads to progress down the funnel, this approach insists that sales teams take deliberate actions (calls, emails, and meetings) at every stage of the sales pipeline.
- Lead management: Easily categorize and prioritize your leads and follow them through customizable pipelines.
- Email tracking: Know when your emails are opened and interacted with by looking at your Pipedrive dashboard.
- Integration capabilities: Pipedrive offers seamless integration with various third-party apps, from email services to marketing automation tools.
- Advanced analytics: In-depth reporting tools allow you to monitor performance metrics and make data-driven decisions.
- Automated workflows: Save time by automating repetitive tasks, from sending follow-up emails to updating lead statuses.
We also offer integrated, embeddable form tools for Salesforce CRM.
Pros and cons of Pipedrive forms
Given that Pipedrive is already so feature-rich, why would you consider using its form feature? Below, we unpack the pros and cons.
Pipedrive pros
- Simplicity: Pipedrive forms are intuitive to create and customize, even for those who aren't particularly tech-savvy.
- Seamless integration: These built-in forms integrate perfectly with your Pipedrive CRM, immediately funneling all captured data into your sales pipeline.
- Customizable fields: From text fields to dropdowns and checkboxes, you can include whatever data points are most relevant to your sales process.
- Automation: Pairing forms with Pipedrive's automation features can create a powerful, streamlined funnel that requires minimal manual intervention.
Pipedrive cons
- Limited design options: While somewhat customizable, Pipedrive forms don't offer as many design features as specialized form builder tools like Feathery.
- Cost: The form feature is unavailable in the basic plan, meaning you’ll have to invest in the LeadBooster add-on to your Pipedrive premium subscription.
How to create and customize a Pipedrive form
Creating a form in Pipedrive isn't rocket science. But to truly harness its power, you need to know how to customize it to fit your specific needs.
Whether you’re a seasoned developer, product manager, or marketer looking to streamline business processes, Pipedrive's forms features can help. Follow the step-by-step guide below to create one.
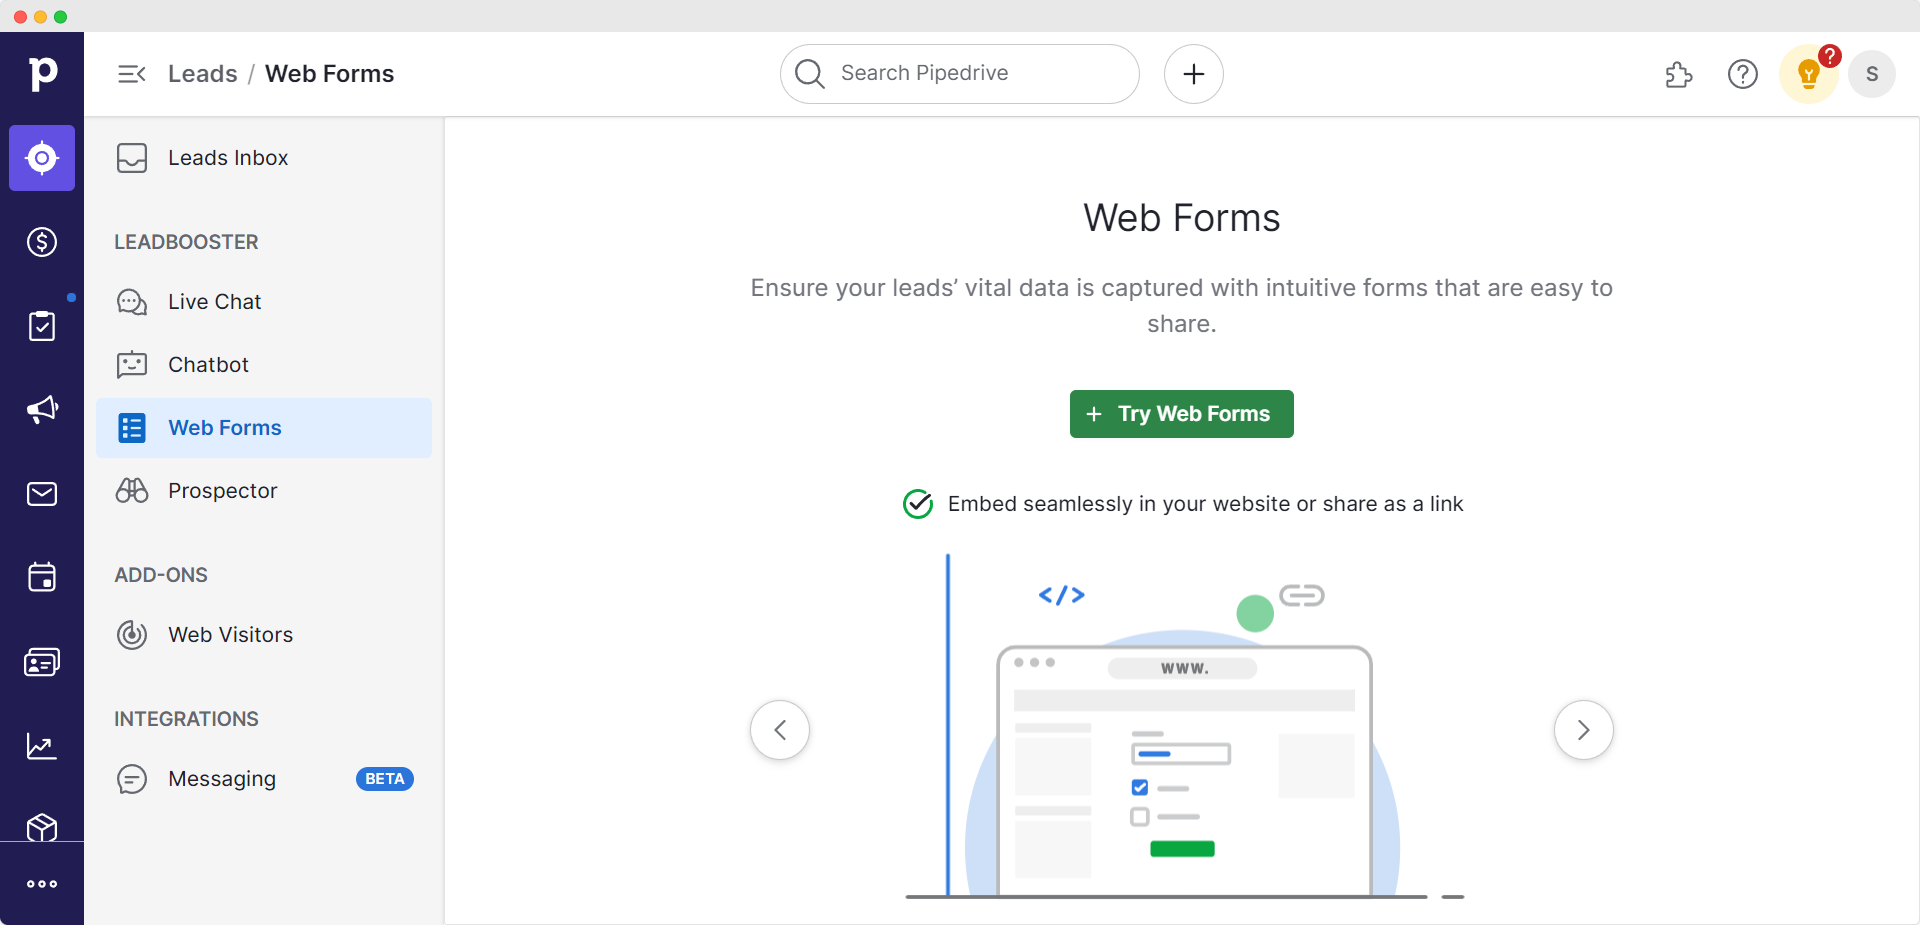
Step 1: Access the Pipedrive Web Forms section
After logging into your Pipedrive account, navigate to the main menu on the left and click the Leads section.
If you haven't activated the LeadBooster add-on yet, you may do so.
Once active, select the Web Forms tab and click the + Try Web Forms button to start building a new form.
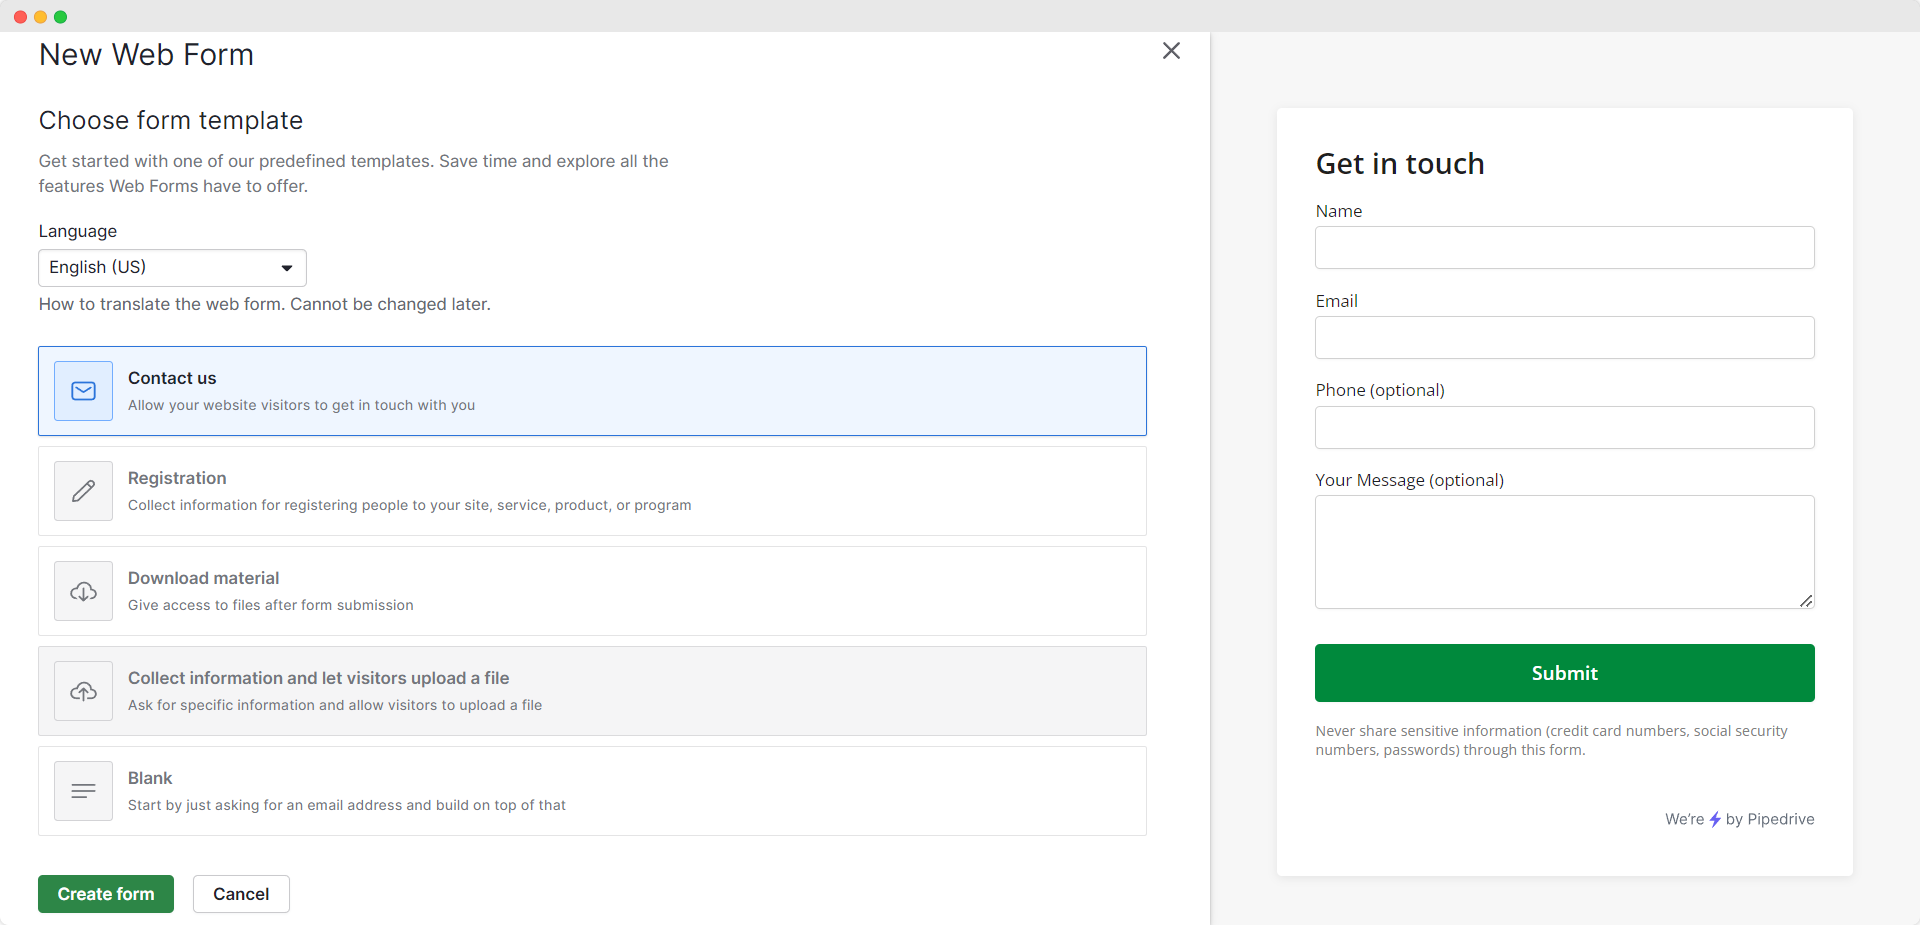
Step 2: Choose a template or start from scratch
Pipedrive offers a handful of form templates to get you started, such as a contact form, registration form, or download material form. You can create your form from scratch by choosing the blank option.
To use your chosen template, click on the Create form button at the bottom left.
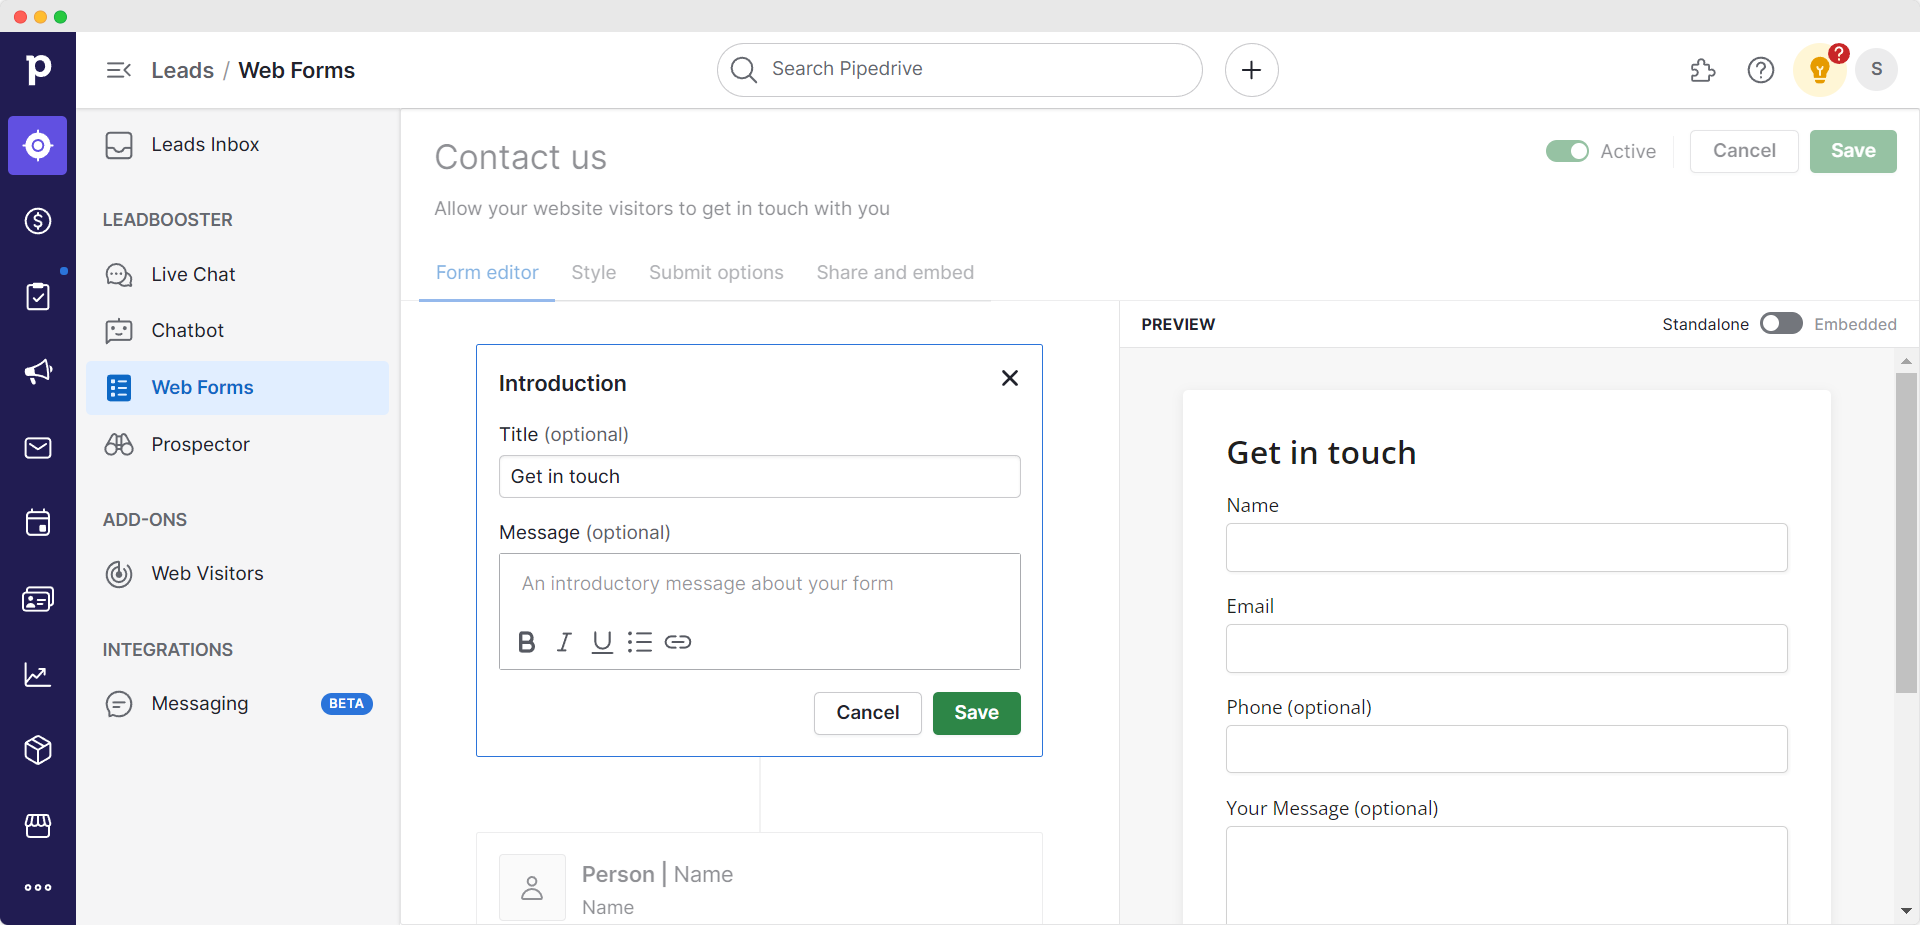
Step 3: Edit, add, and delete fields
In the Form Editor, click on any form field on the left to edit its properties. You can rename fields, make them mandatory, or add placeholder text.
You'll see your changes in the form preview on the right.
To add custom fields, hover over the area between any of the current form fields and click on the green + icon that appears.
This will enable you to add a new block in that area.
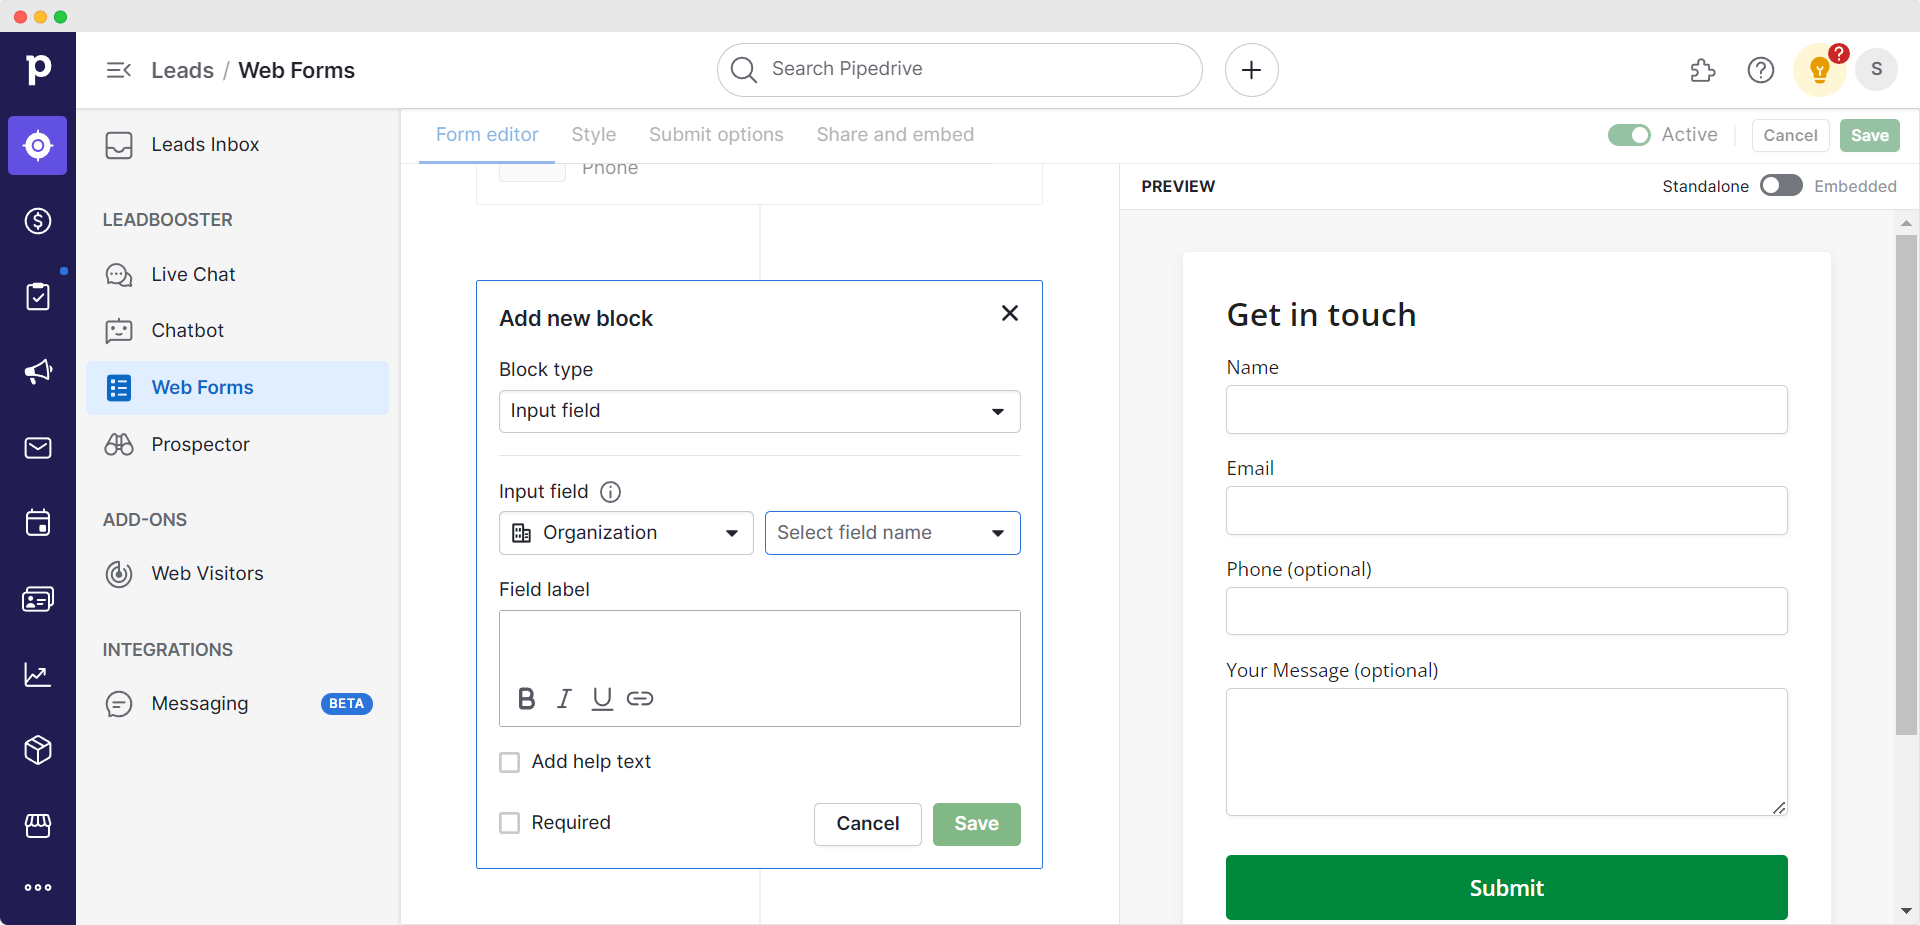
You can also remove any entry fields you don't need by clicking on the trashcan icon on the right when you hover over a field.

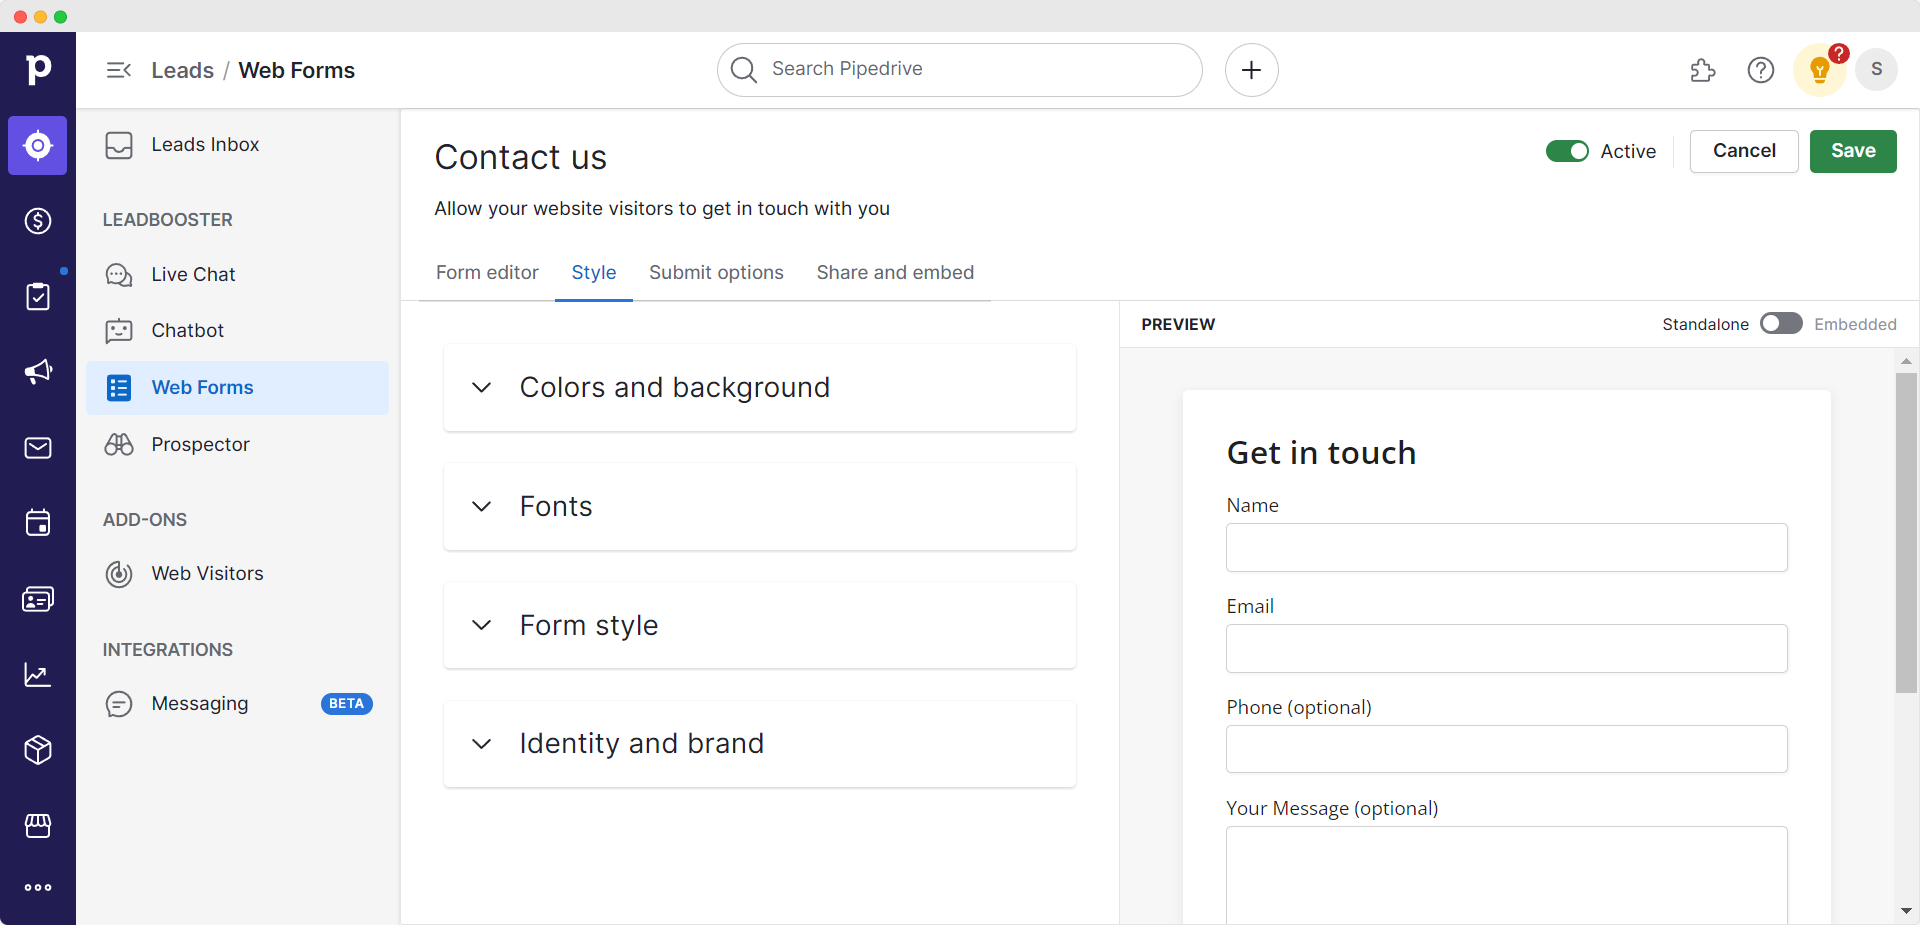
Step 4: Customize your Pipedrive CRM form
Although Pipedrive's design options are somewhat limited, you still have some control over the form’s aesthetics.
Navigate to the Style tab in the Form Editor. You can choose your color scheme, adjust fonts, edit the form style, and add your company logo.
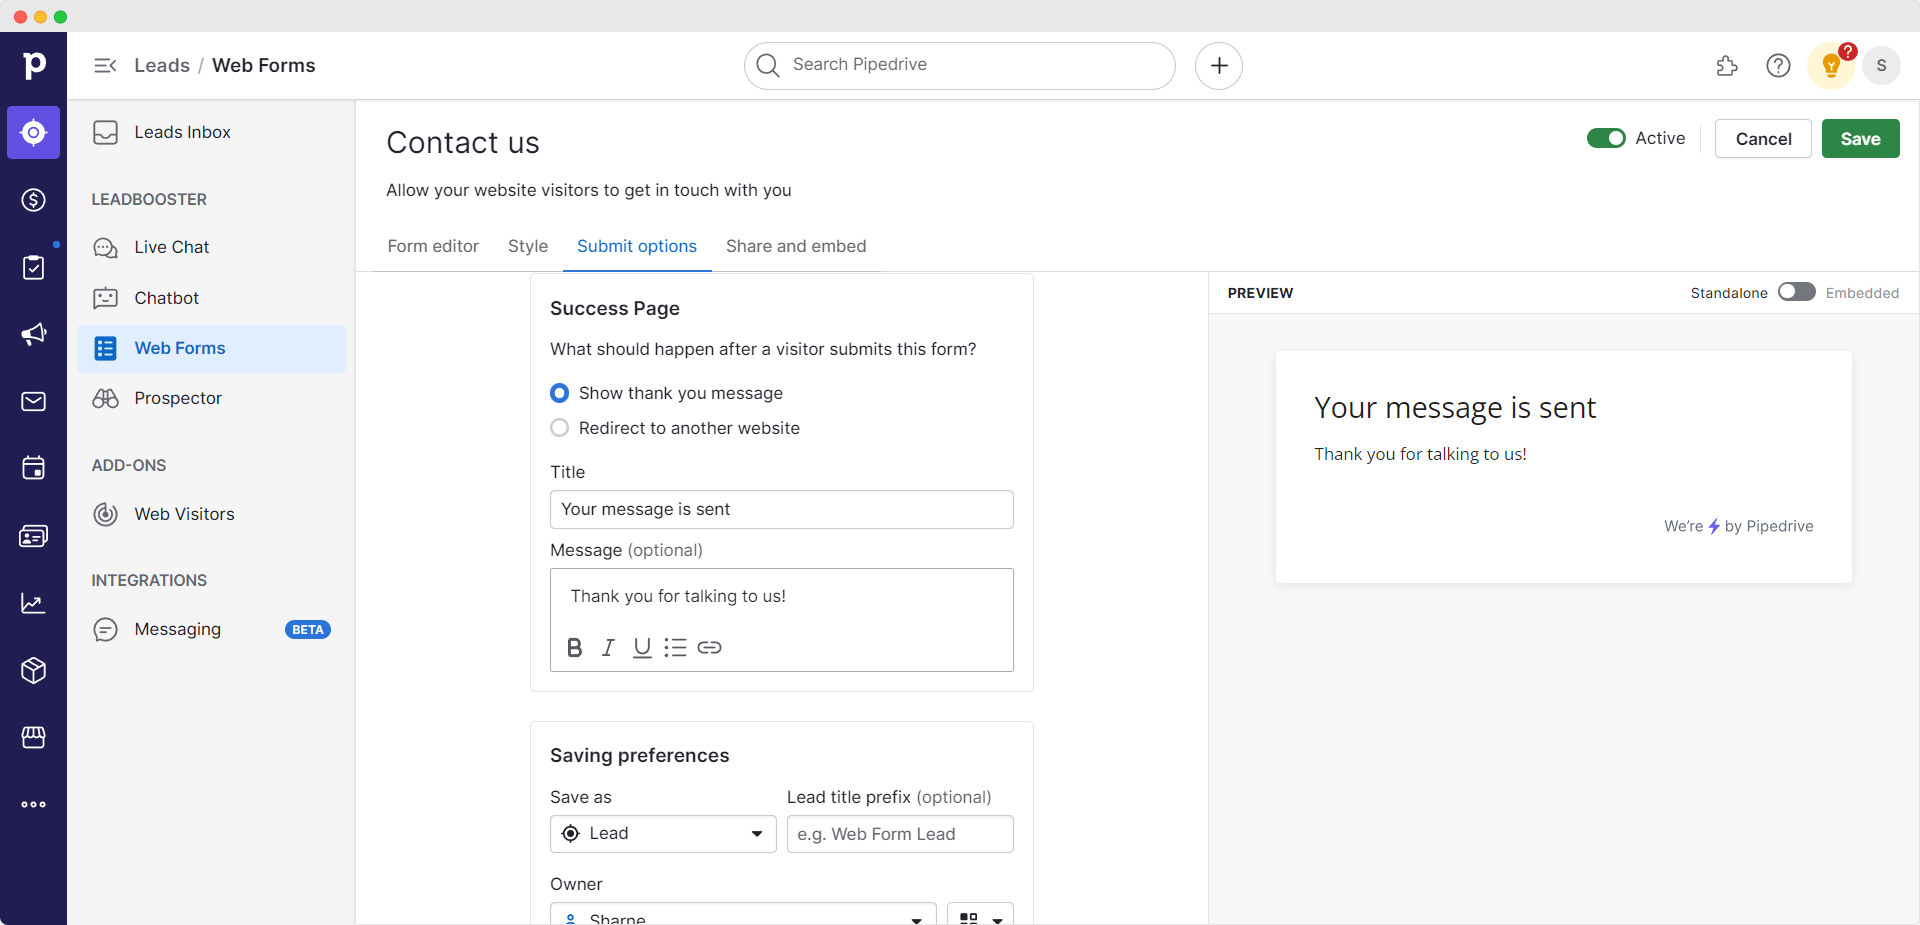
Step 5: Set up data collection and automation
When you go to the Submit options tab in the form builder, you can choose what happens after a user submits a form.
These options include a thank-you email sent to the user's email address and automatically assigning a lead in the CRM to a particular team member.
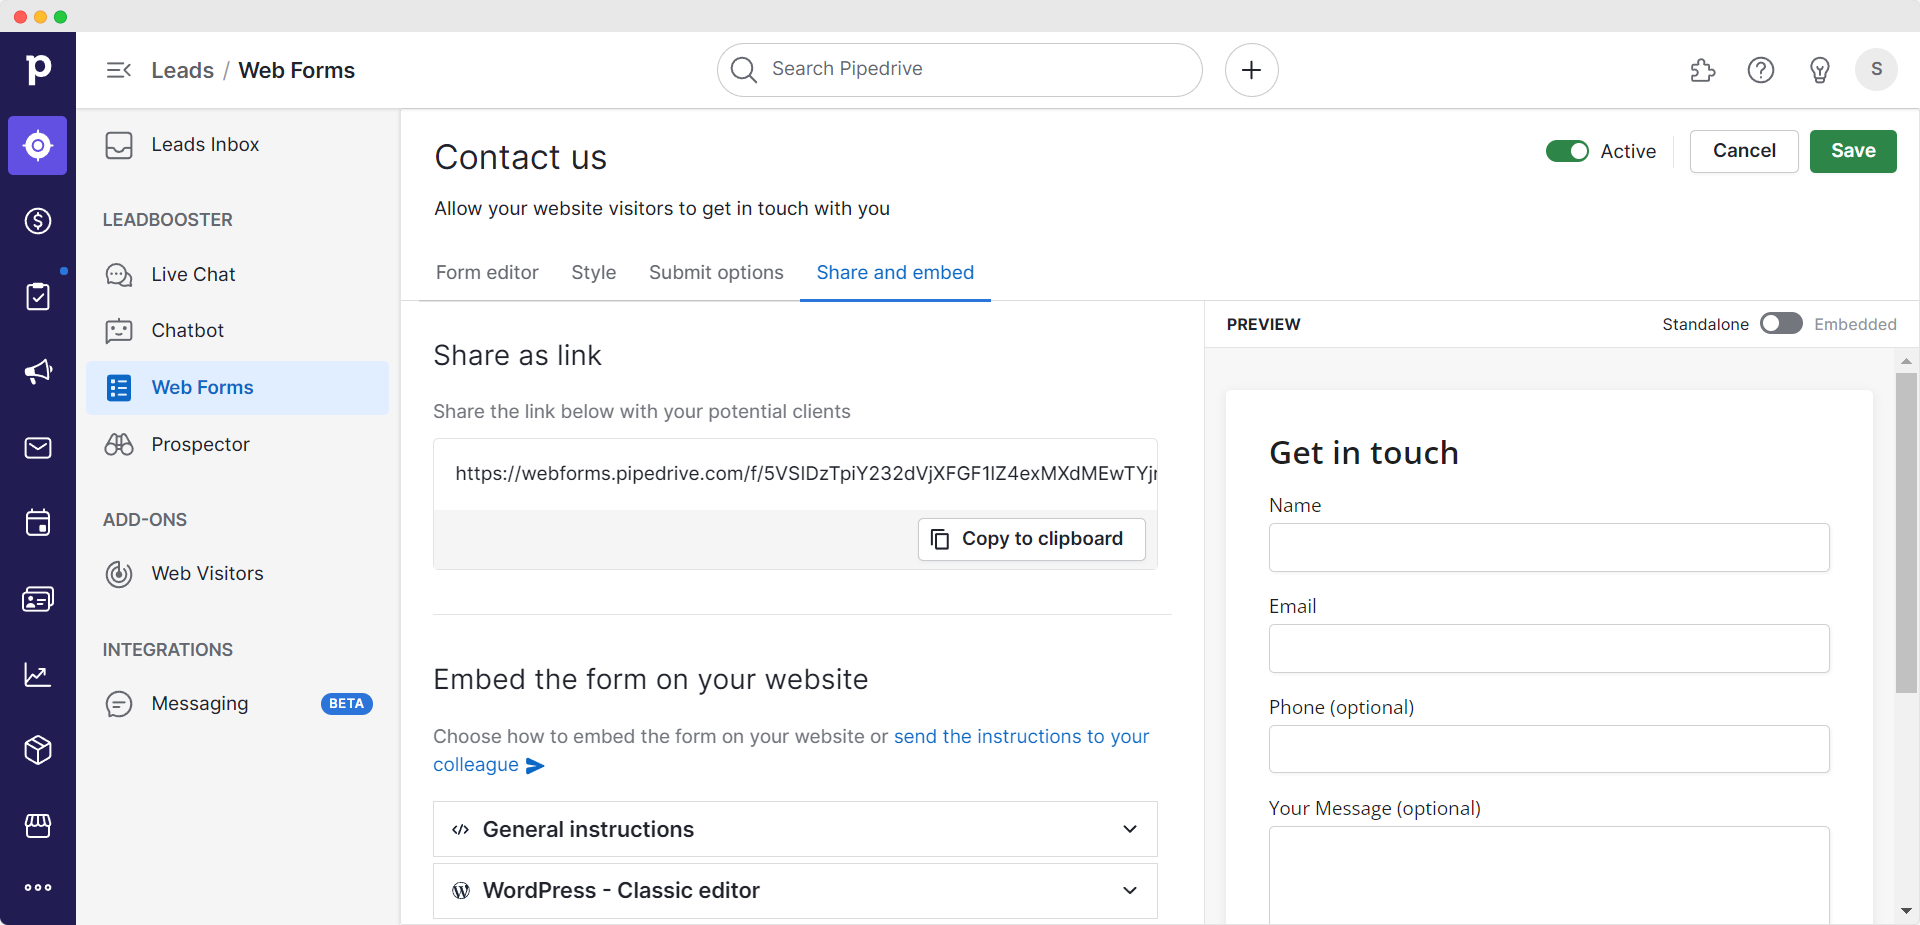
Step 6: Share or embed your Pipedrive Web Form
Now that you've set up your custom form, you can opt to share the link or embed the form on your website.
To do this, go to the Share and embed tab in the Form Editor, copy the shareable link, or choose one of the form embed options.
Does your team use Asana for task management? You can also use embedded Feathery forms to create and manage Asana tasks.
How to create Pipedrive forms with Feathery
Pipedrive's Web Forms feature includes a handful of customization options for your sales and marketing teams. But if you're seeking more advanced customization, Feathery offers a Pipedrive forms alternative.
With Feathery, you can craft functional, bespoke branded forms. Here's how:
Step 1: Create a new Feathery form
Log into your Feathery account and navigate to the Forms section.
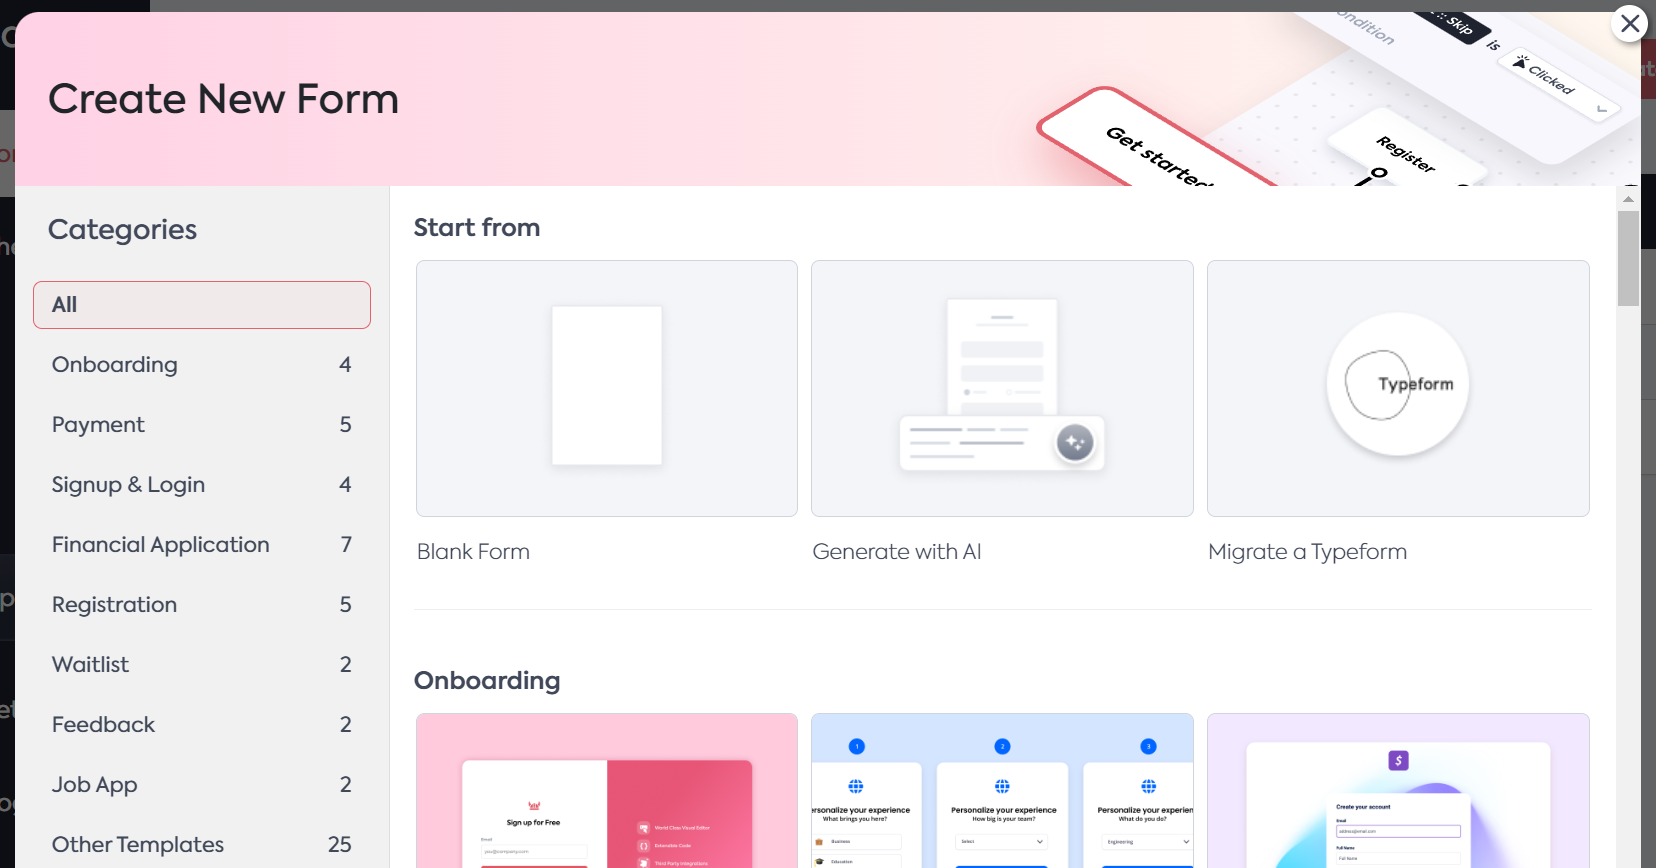
Click the Create New Form button to open the form editor.
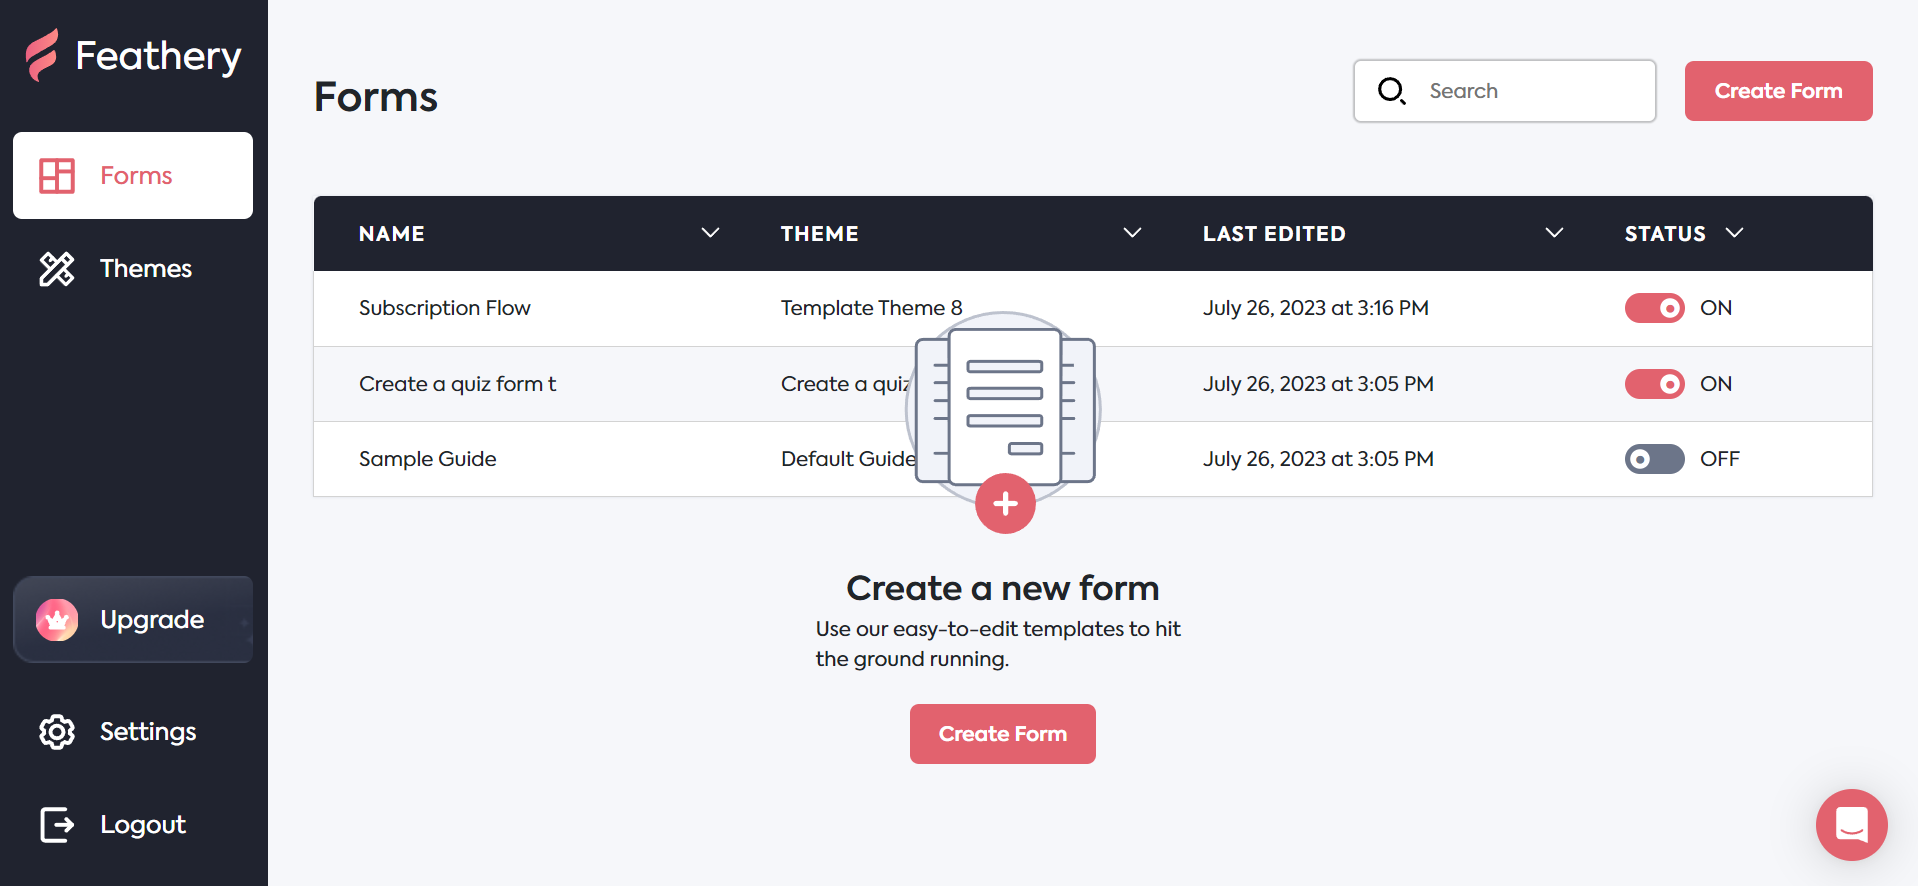
You can select from our vast library of powerful form templates to start your form.
The other options you can choose are starting with a blank form, generating a form with AI, or migrating a Typeform.
Step 2: Design and customize your form
Feathery offers an intuitive drag-and-drop interface. You can access more advanced design options than those available on Pipedrive's native web form feature.
Select the fields you wish to include and drag them into your form.
You also have the option to style every element in your forms with CSS. This gives you granular control over the look and feel of your entire form.
Try it in the interactive demo below:
Step 3: Add conditional logic flows
A major advantage of using Feathery for your Pipedrive forms is that you can add conditional logic rules. This enables you to show and hide form fields based on the user's responses.
This not only improves the customer experience but also increases conversion rates.
To add conditional logic to your online web form, navigate to the Flow tab in the Form Designer. You can create new branches and choose what happens after each action.
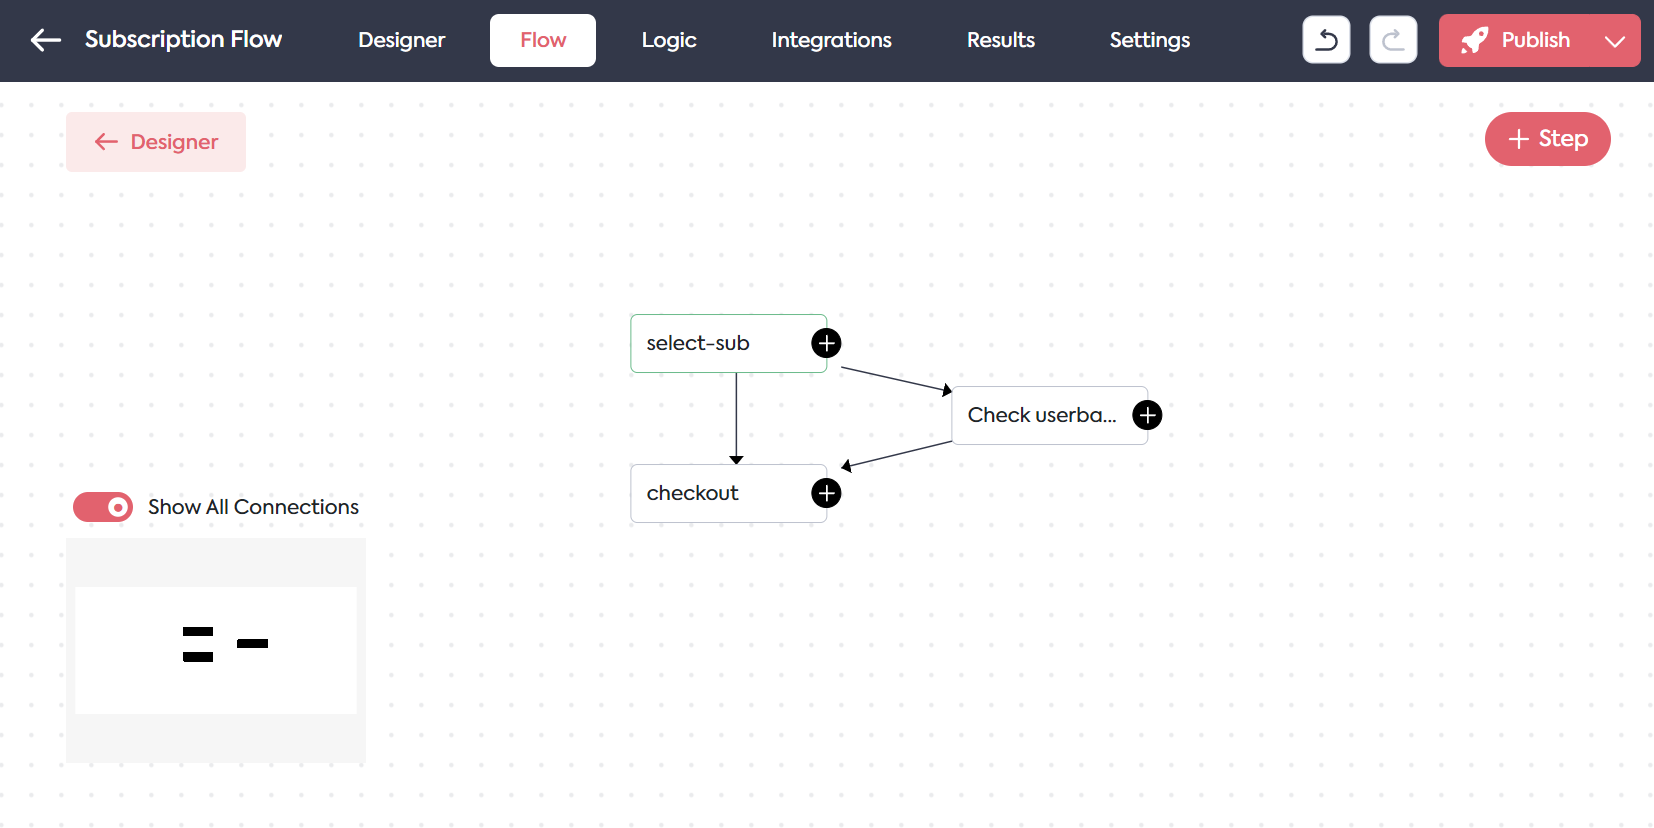
For help with using Feathery Flows, check out our knowledge base.
Step 4: Preview and test your form
We suggest always previewing your form to ensure it looks and functions as expected.
Click the arrow on the Publish button and select Preview Draft (doesn't save any form data) or Test Form (saves the form data).

Run a few tests to ensure the data is correctly captured and directed where it should go.
Step 5: Publish your form
Once you're satisfied with your form's current design and functionality, it’s time to make it live. Click the Publish button.
Step 6: Connect Feathery's Pipedrive integration
Now that your form is live, you can perform the direct integration. Navigate to the Integrations tab at the top of the screen and search for Pipedrive.

Click on the Pipedrive integration card. The integration settings sidebar will open.
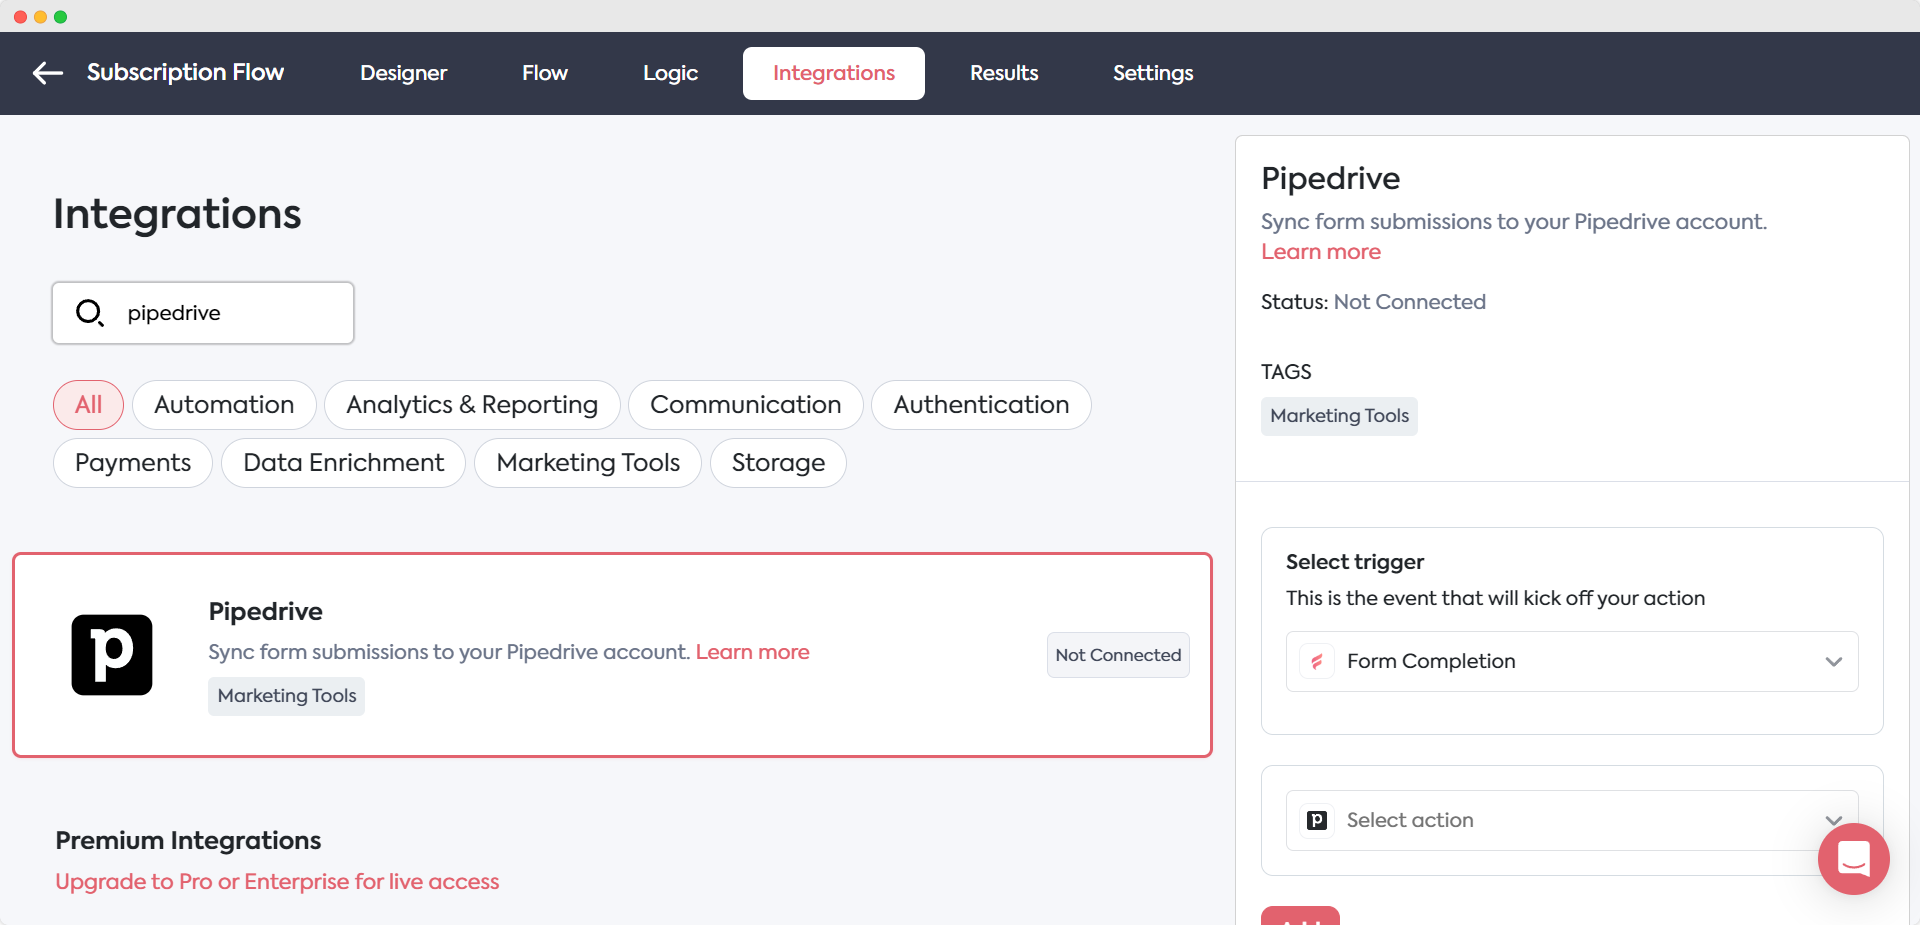
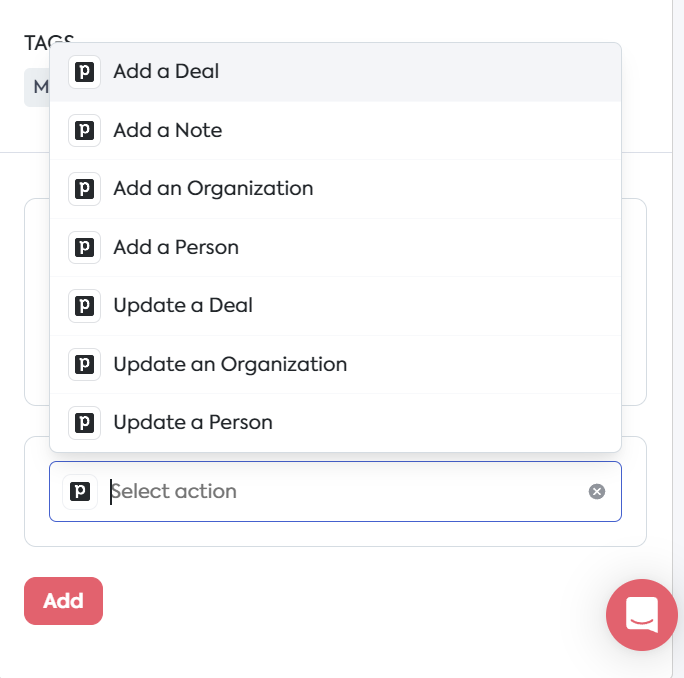
Select the form Trigger from the dropdown.
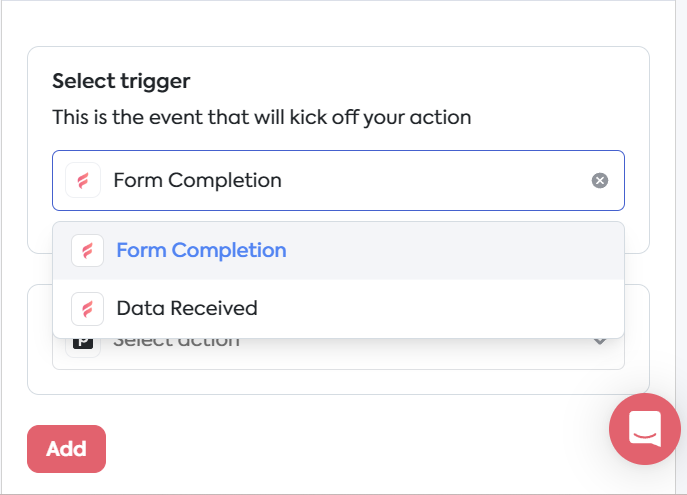
Choose the Action that must take place after the form Trigger. You can add more than once action after completing setup.
Now you can connect your Pipedrive account. Click on Add account and follow the prompts to log into your Pipedrive account.
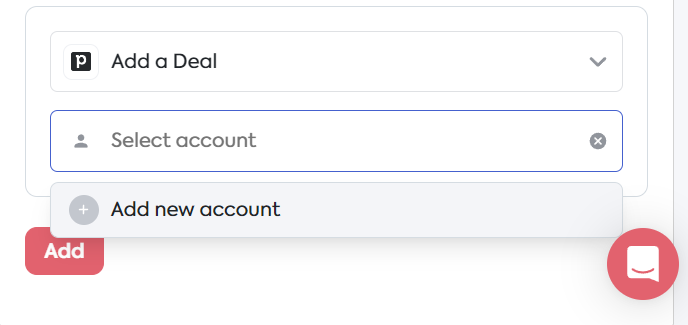
Complete the other customizable form fields and click the Add button at the bottom of the sidebar.

Your Pipedrive form is now connected and you can use Feathery for contact management, inbound lead capture, and other complex forms.
Step 7: Share or embed your form
After integration, you can either share a direct link to your form or embed it into your website.
Both methods ensure that any data entered will be automatically sent to your Pipedrive account.
Navigate to the Designer tab and click the drop-down arrow on the Publish button.
- Share your form: Click on the link icon to copy your shareable form link.
- Embed your form: Click on Embed > Javascript for a code snippet or Embed > React for the SDK to embed your form.
Pipedrive forms best practices
Creating beautiful forms with smart functionality is easy with Feathery, and integrating them with your Pipedrive CRM is a straightforward process.
Let's look at some advanced best practices that can help you optimize your forms for the best results, whether you need scalability or streamlined processes.
Build single-purpose forms
Your forms should serve specific purposes: one for potential customers, another for current customer feedback, and yet another for access to customer support. Each form should be tailored to its specific function.
To capture qualified leads, you must ask a few pertinent questions and garner their email addresses. For customer feedback, you may want to use a five-star rating element to get a customer satisfaction score. Customer support query forms work well when they have a file upload option.
How to implement single-purpose forms:
- Identify the different stages of your customer journey.
- Create separate forms with questions tailored to each stage. This can range from basic lead capture forms to more detailed question types for customer feedback.
- Ensure your Pipedrive integration assigns a team member to the deal.
- Set up email notifications for action-based selling.
Prioritize essential fields
User experience is critical. Overwhelming your users with too many form fields can lead to form abandonment.
In sales, the name, email address, and contact number are the most important data you want to capture.
How to implement essential fields:
- Start building your form with only the most essential fields, like name and email for lead generation forms, and scale it from there.
- Use conditional fields to display additional questions only when relevant to the user, making the form appear less daunting.
- Make the most important fields compulsory (required).
Mobile optimization
Many form submissions occur on mobile devices. If your form isn’t optimized for mobile, there's a risk that the user won't complete it or have a negative user experience.
How to implement mobile optimization:
- Keep it simple. The fewer the fields, the easier to complete the form on a mobile device.
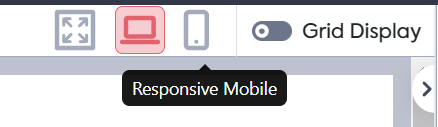
- Test your form on multiple mobile devices and browsers to ensure compatibility. In Feathery's Designer, you can toggle the mobile view to ensure your form is 100% mobile-friendly.
Follow-up automation
In action-based selling, timely follow-up is crucial in converting leads. Setting up smart form automations ensures that every submission triggers an immediate response from your team.
How to implement form automations:
- Use Pipedrive's built-in automation features to send instant acknowledgments and thank-you emails when certain criteria are met.
- Rely on Feathery's Pipedrive integration to automatically populate your CRM from online form submissions.
- Set triggers and actions in Feathery's Pipedrive integration for lead assignments to automatically direct new submissions to the appropriate team members.
A/B testing
Regular testing is the only way to know if your form performs at its best. A/B testing, or split testing, is an experimental approach used to compare two versions of a webpage, app, or other digital assets against each other to determine which one performs better.
The concept is straightforward: you divide your audience into two groups. One group sees Version A (the control), while the other group sees Version B (the variation).
By examining the data, you can understand which version of the form yielded better results. This allows you to make data-driven decisions to optimize your forms for higher conversion rates, better user engagement, and other desirable outcomes.
How to implement A/B testing:
- Create two versions of the same form with varying elements such as call-to-action (CTA) text, button color, form length, or field labels.
- Use an A/B testing tool on your website to deliver different page versions to different users.
- Use Pipedrive's analytics tools to evaluate performance metrics like submission rates and time spent on forms.
These best practices will help you maximize Pipedrive's capabilities. It will also enable you to set up a system that can generate higher quality leads, boost conversions, and ultimately drive business success.
Your next steps: Building dynamic Pipedrive forms
With user-friendly platforms like Pipedrive and Feathery, you can create powerful, effective forms to populate your CRM automatically.
As a salesperson or marketer, this frees you up to focus on strategy rather than getting bogged down with technical details.
Feathery's direct integration with Pipedrive and simple setup process makes it incredibly easy to connect your forms to your sales pipeline. You can automatically assign team members after an action is taken and send email notifications.
Ready to try an intuitive builder for Pipedrive forms? Create a free Feathery form.
FAQ
.svg)
The Web Forms functionality isn't available on Pipedrive’s basic plan. You'll need to upgrade to one of the more advanced plans and activate the LeadBooster add-on to access this feature.
Yes. Pipedrive offers various third-party integrations, including email services, marketing tools, and more.
Pipedrive integrates with Feathery, a robust online form builder platform. It empowers you to create dynamic forms with conditional logic fields and flows. You can use its intuitive drag-and-drop interface to create sophisticated forms with bespoke designs.
Pipedrive Web Forms doesn't offer this feature, but you can achieve it through an integrated form-building tool like Feathery.
To set up the integration, go to Feathery's Integrations tab and search for Pipedrive. Follow the steps in this article to connect your Pipedrive account and start populating your CRM with forms.
Pipedrive provides a few customization options, including changing the color scheme, adding your company logo, and altering text fields. However, for advanced customization like conditional fields or specialized follow-up actions, you may need to use a more specialized tool like Feathery.
Feathery empowers you to drag and drop form elements and customize them, such as adjusting the width, color, and font. You can also insert code into your forms, offering a developer-friendly solution for more technical applications.

